

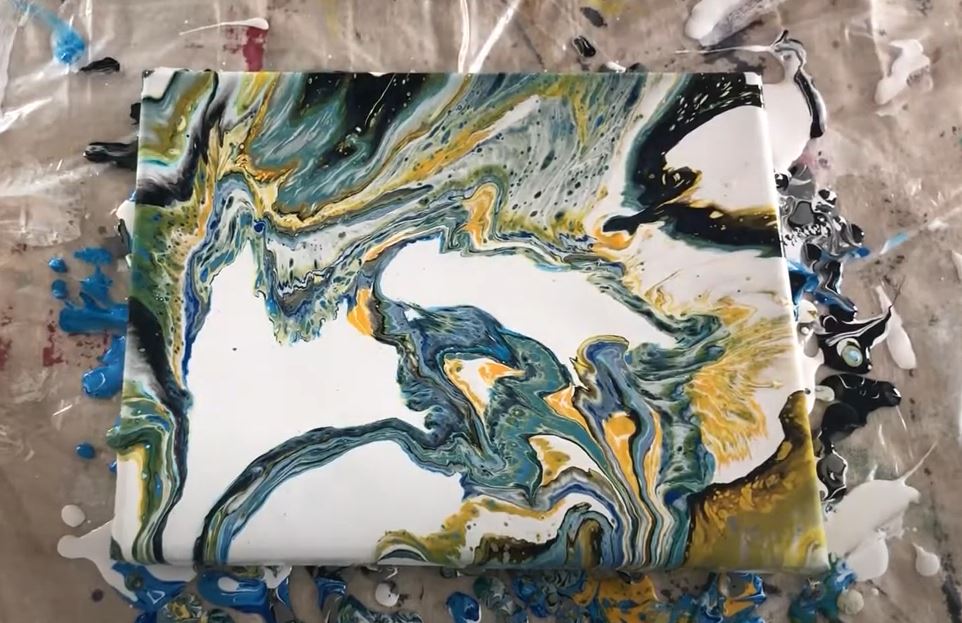
How To Make Large Cells In A Pour Painting

Acrylic Pigment Pouring is a fluid painting technique used to create art past pouring acrylic paint onto a sail. Many methods tin exist used to apply the paint to the sheet, some are more simple and are amend for beginners – others are a bit more than technical! Here nosotros cover the basics of pouring to get you off to a head start!
The Acrylic Pouring technique allows artists to apply colour in puddles, pools and marble-similar patterns. Pouring results in a smooth, glossy pigment pic that is perfectly even and blemish gratis. It is particularly popular with beginners equally information technology allows artists to create quick paintings with dramatic, contemporary results.
No affair which technique y'all opt for, you volition need to treat your acrylic pigment before creating your pours. Treating the paint makes information technology the right consistency for dripping and pouring and lessens the chances of your pigment films great and violent.
Although the technique may await and seem elementary, it can be a tricky affair to master. Especially if you don't know what you are doing! In this blog mail nosotros cover the basics of acrylic pouring, so you know what to expect before you become started!
What Materials Do I Need For Acrylic Pouring?
Before you first, it's important to make sure you lot have all the correct materials to hand! There's nothing more than frustrating than commencement an acrylic pour, only to detect that you lot are missing an essential tool.
You'll need a selection of acrylic paints to go started. The colour is completely upward to you but you will need to call back about the 'body' of the pigment that yous utilize. The consistency of acrylic paint will touch the success of your pour.
Soft Body Acrylic Paints and Acrylic Inks
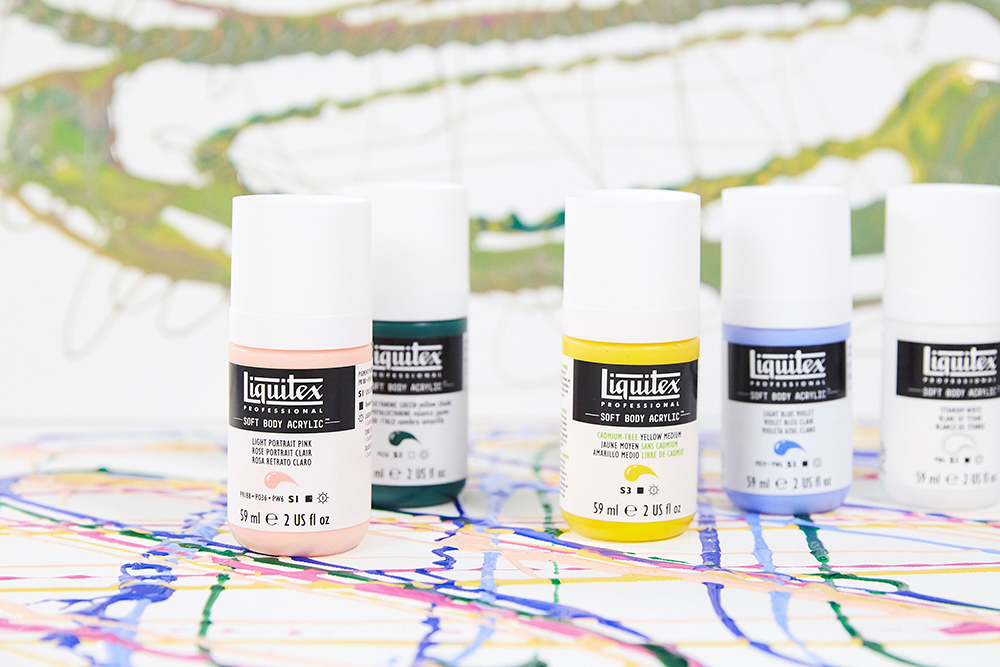
Acrylic Inks and Soft Body, High Menstruum or Fluid Acrylic Paints are the perfect consistency for acrylic pour painting. Their consistency unremarkably falls between milk (ink and high menstruum) and heavy cream (soft torso and fluid). This low viscosity makes it much easier to alloy your colour with pouring medium and requires less medium to get it to a pouring consistency.
Heavy Body Acrylic Paints
Heavy Torso acrylics have a much thicker consistency. Although they tin can be used with a pouring technique you will find that you need more than medium to get them to the dear-like viscosity required for pouring. Some artists choose to thin the colour first with a fluid medium before adding pouring medium. Yous can get away with using a small amount of water to sparse your colour before adding pouring medium, but exist aware that too much h2o can increase the chances of your pour failing.
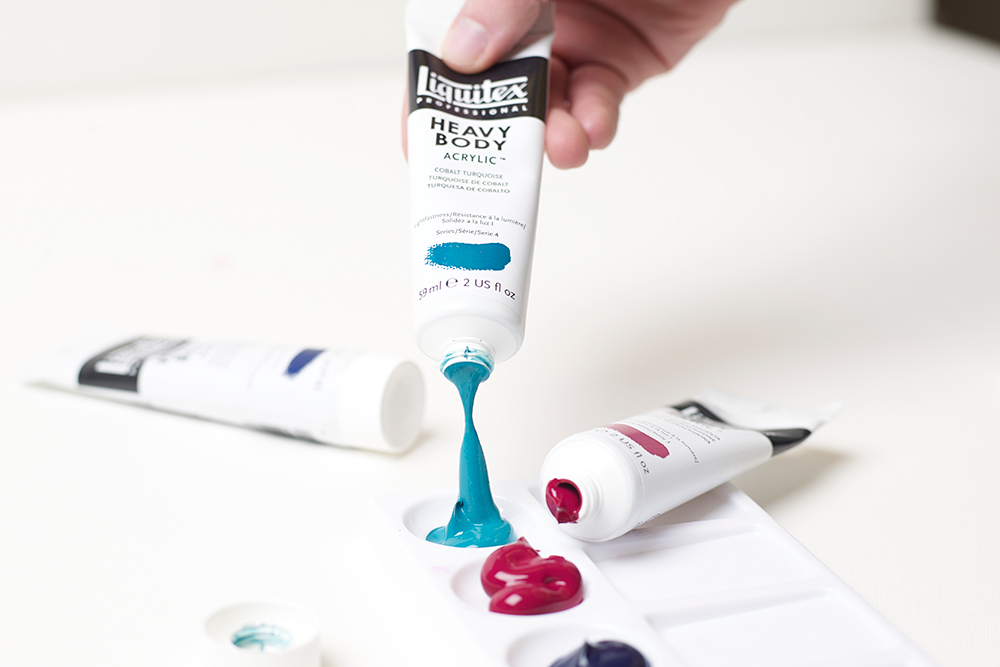
Using thick paint also ways it is much harder to mix your paint and medium to a smooth, uniform finish. Too much agitation to go rid of clumps can create lots of bubbles in your pouring mixture. Consequently, these bubbles can mean your poured painting develops an uneven, textured end. While you lot can pop these bubbles using methods we talk over after, information technology is e'er advisable to negate the chances of these bubbling forming by using a consistency of acrylic paint best suited to the pouring process.
Student Class Acrylic Paints
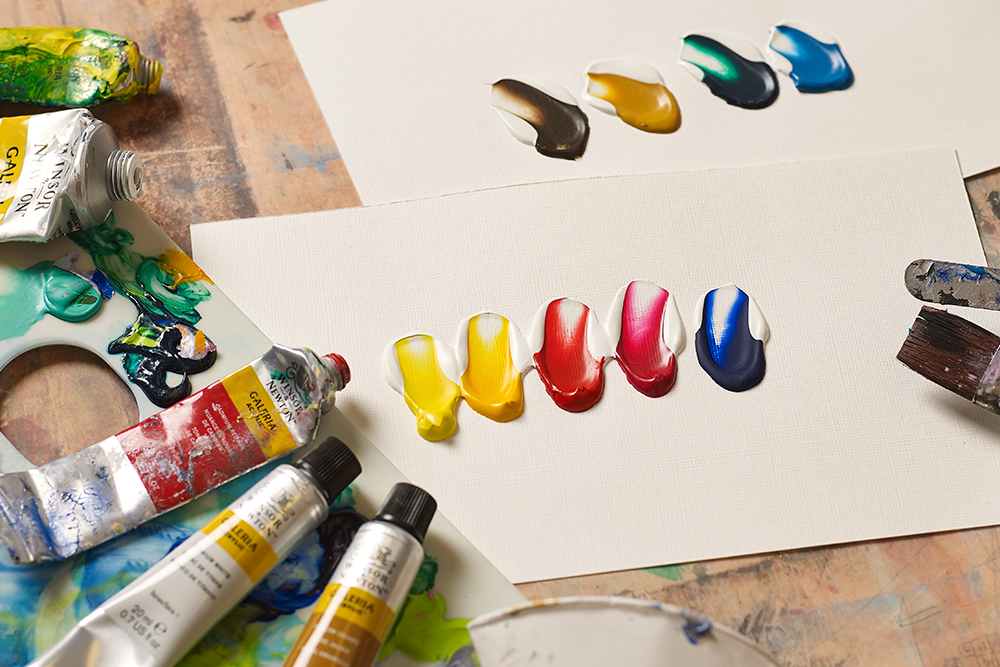
Student course acrylic paints – like Winsor & Newton Galeria, Daler Rowney Arrangement 3 and Sennelier Abstract – are not available in different consistencies. Their texture mostly falls between soft and heavy body – with Arrangement 3 being the nearly fluid and Abstract existence the thickest. They can be used with pouring techniques, merely require more medium to get them to a pouring consistency.
You can discover out more than nearly different acrylic paint consistencies on our blog.
Acrylic Pouring Medium
Liquitex Acrylic Pouring Medium has a special formula that gives the well-nigh seamless results when used with pour painting techniques. Using a dedicated acrylic pouring medium, rather than cheaper alternatives lessens the take chances of blemishes actualization every bit your cascade dries. Pouring Medium is self-levelling – so you can almost guarantee a smooth, even paint picture show. It also expels bubbles more than readily, meaning yous are much less likely to have tiny air pockets trapped in your finished painting. It is likewise a little tacky, like syrup or love. This creates a consistency that is much easier for pouring as information technology adheres more to the surface so your paint film spreads evenly without running speedily off the border of the canvas.
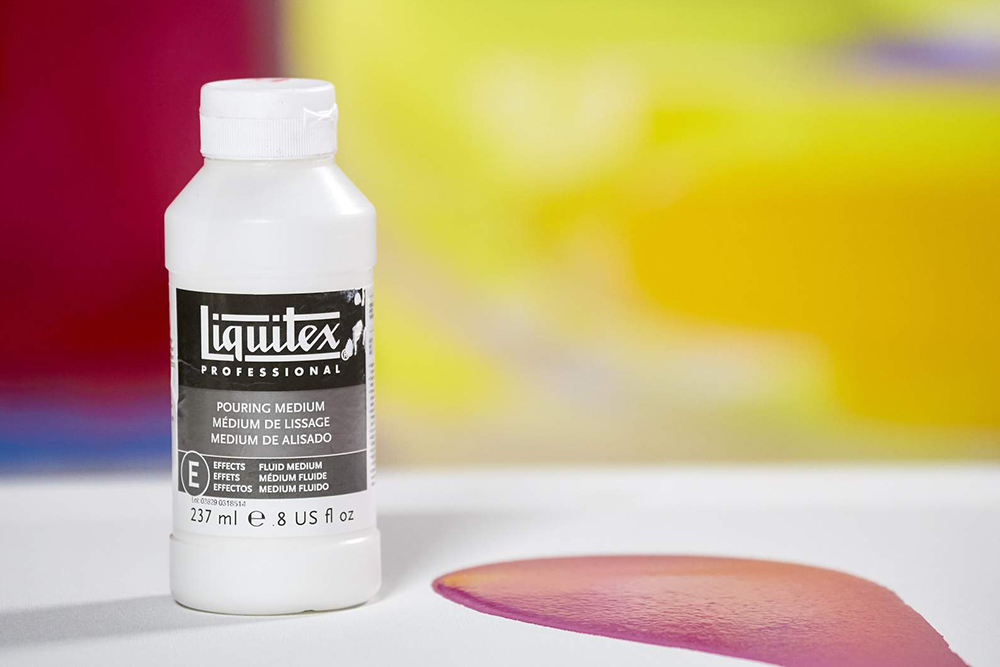
Some artists opt for using PVA adhesive (with added h2o for thicker paints) to give their paints a fluid consistency. However, this does add another layer of unpredictability to the pouring process. It does non give the same syrupy consistency as a proper pouring medium – oftentimes causing pigment to be too thick or too sparse, making it difficult to control your cascade. Information technology also does non account for the shrinkage of acrylic paint equally information technology dries. This tin cause unsightly cracks and tears to form in your painting. Liquitex brand Pouring Medium to the same professional grade as the rest of their archival creative person materials. Something that PVA is not. PVA can be smashing for starting out, but as your skills progress you may wish to motility onto pouring medium for a more controlled result.
Sheet, Boards or Painting Panels
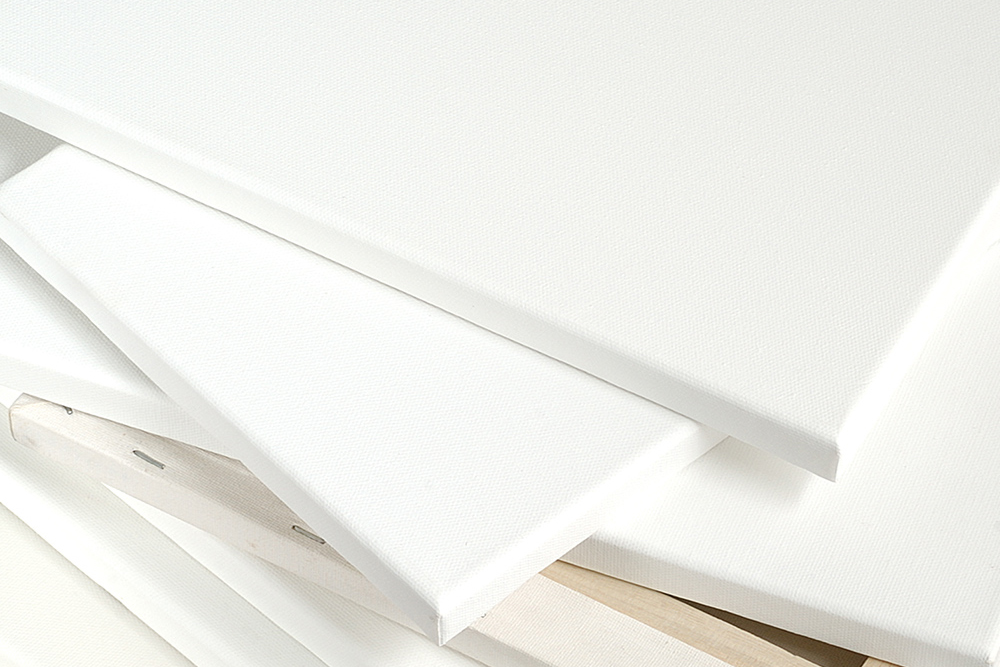
Virtually whatever flat surface that has been properly primed for acrylic painting will exist suitable for acrylic pour painting. Some artists prefer to piece of work on traditional stretched canvases, whereas others may prefer canvas boards or painting panels that are easier to shop. The choice is upwards to you! Each have their benefits. There is more information nearly prepping your sail below.
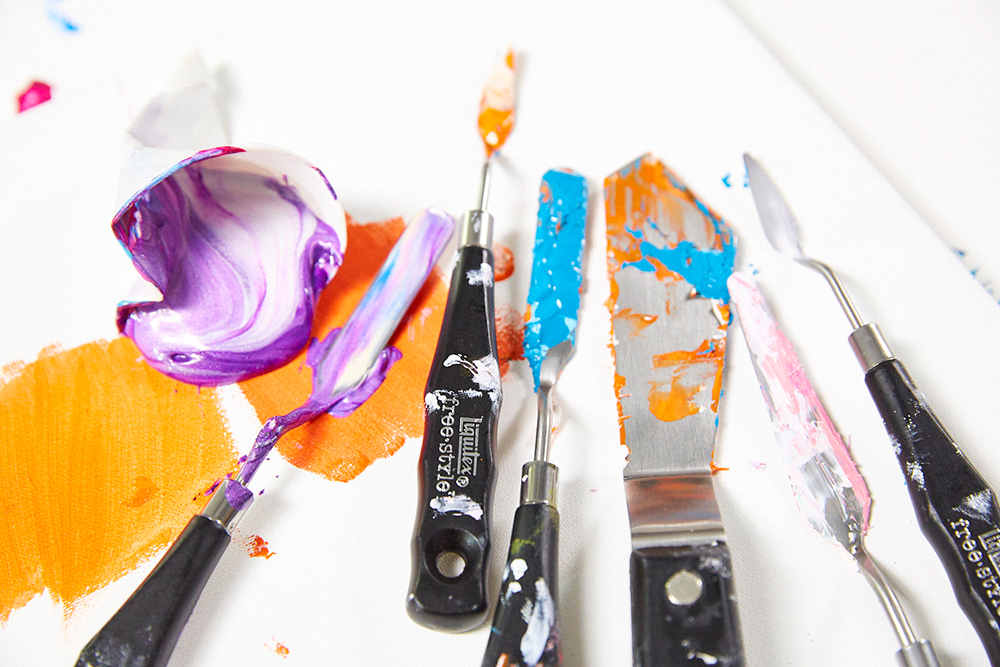
Acrylic Pouring Accessories
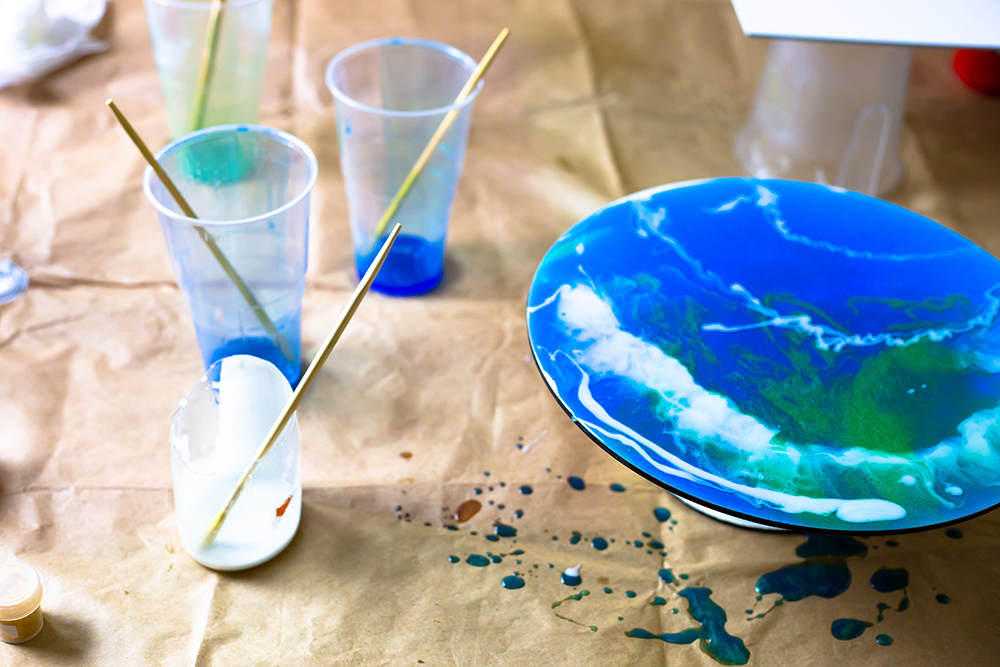
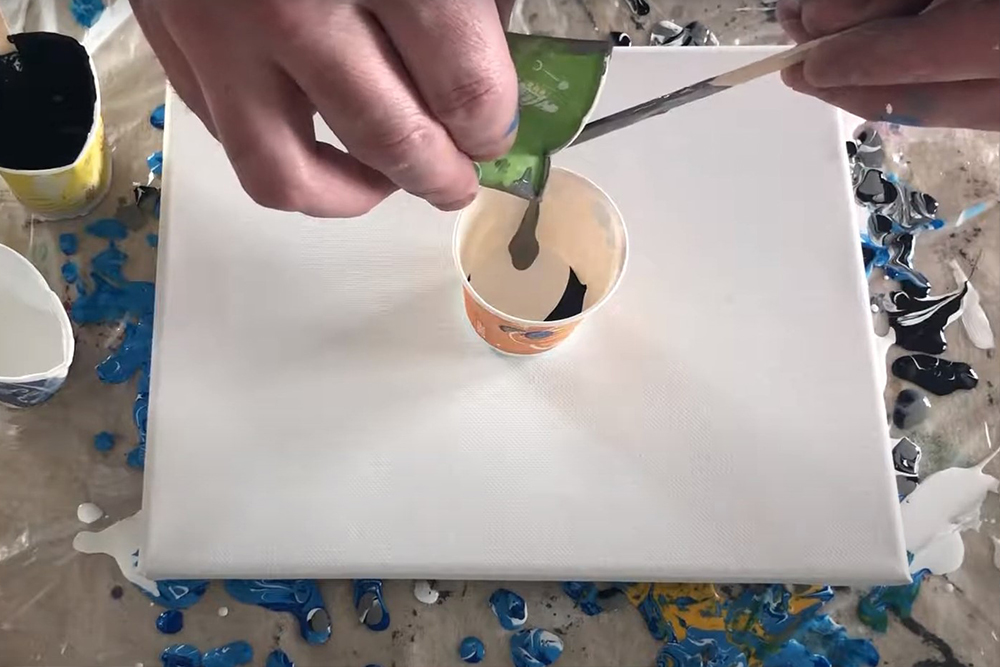
There are a number of accessories yous may find it useful to have to hand when you are pouring. Dispensable paper cups are handy for creating your acrylic paint and pouring mixes. They are easy to agree and perfect for controlling the amount of pigment poured onto your canvass. Wooden arts and crafts spatulas or palette knives are smashing for mixing to ensure your color/medium mixes are completely uniform.
You should as well make sure to protect your workspace with a protective surface, every bit this technique can go messy quickly. Old sheets, newspapers, plastic sheeting and bin numberless are perfect for this purpose.
It tin also be handy to take a choice of similarly sized tins or jars bachelor to stand up your canvas or board on whilst y'all are pouring. Elevating your boards above your workspace volition forbid any excess paint from sticking to the bottom of your painting.
As you endeavour more than advanced acrylic pouring techniques you may also require other tools to assist you – such as balloons, colanders or funnels.
Preparation
Preparing Your Painting Surface
You'll demand to get your canvas or panel prepared ready for creating your poured acrylic painting. Nigh any surface primed for acrylic painting will exist suitable for pouring – whether you choose traditional stretched canvas, canvas boards or painting panels is up to you lot.
Consider the Surface You lot Utilize
Acrylic pours can become quite heavy so consider the surface you use. Stretched Canvases have a hollow recess in the dorsum between the wooden stretchers. The heavier your pour the more than likely the centre of the sail is to bow. This will create an uneven pigment film that is more likely to crack or tear as it dries. Y'all can avert this problem by bracing the dorsum of the sail with carte or another appropriately sized apartment object. A brace will fifty-fifty out the surface, lessening the chances of an uneven paint picture. You can also use wooden canvas keys to increase the tension of the canvass. Canvas boards and painting panels are more rigid. Smoothen surfaces create the all-time pours – you may demand to sand or prime the surface if you find the texture of your surface is affecting the pour.
Y'all volition as well need to make sure that your sail or board is on a completely level surface. Uneven surfaces tin can cause your colours to pool and shift, creating an irregular paint picture. Yous tin use a spirit level to double check you workspace if you are worried.
Elevate your Lath or Canvas
As mentioned previously, it can be useful to elevate your sheet or lath to a higher place your workspace. Equally excess paint flows off the sides of your sheet information technology will pool underneath. If your canvas comes into contact with this paint it can make it very difficult to remove without disturbing the pigment movie, specially once dry. Jars, tins, push pins or even old paint tubs tin exist used – you'll just demand to brand sure they are all roughly the same height. Put 1 where each corner of your canvass will sit and place your canvas on tiptop.
Allow a good couple of centimetres of infinite betwixt the tub and the border of your canvas. If they come up into contact it can crusade cruddy lips and ridges of paint equally the excess pigment flows from the sail and onto the tub.
If you would prefer to use push pins all y'all'd need to exercise is gently press a pin into each corner of the sail. Once your canvas is elevated you won't need to worry about any excess paint ruining your work!
Many artists choose to begin their work on a white ground, but you may prefer to colour your ground earlier you lot paint. This can be whatever shade that y'all similar, only you should comport in mind that the paints yous pour on top will be affected past your choice.
Make sure your surface is clean
Before you start painting you'll also demand to brand certain your painting surface is make clean. You should remove any dust or big particles of dirt with a lint-gratuitous cloth. Too brand sure the surface is completely grease free. Any residual grease tin cause improper adhesion of pigment.
Mixing Your Paints and Pouring Medium
Before you start painting you will need to fix your mixes. If yous are using Liquitex Pouring Medium you should utilise approximately 1 cup (250ml) of Pouring Medium for every 1 heaped tablespoon of Liquitex Soft Torso Colour. These measurements will vary depending on the type of paint you are using. You will use a lot more medium if you lot use thicker pigment. Essentially you will need to gradually mix in medium until your mixture is a pourable, honey-like consistency. If you are creating custom colours rather than using colours straight from the pot you volition need to brand sure they are mixed to a uniform finish before calculation your medium.
If you lot are practising pouring with a PVA glue mixture and so y'all should use approximately two parts gum to i part paint. It should have a similar sort of consistency to pouring medium, although yous probably won't be able to get the same tackiness.
Whether yous're working with Pouring Medium or PVA, you will need to make sure your paints are mixed carefully but thoroughly. Y'all should mix gently with a spatula or palette pocketknife to try to avoid getting bubbling in your mixture. Some bubbles may exist inevitable if you are using PVA. However, Pouring Medium is formulated to reduce the corporeality of bubbles created. If you get out your pouring medium mix to sit for effectually 10 minutes whatsoever bubbles that have formed should disappear.
Choosing Your Colours
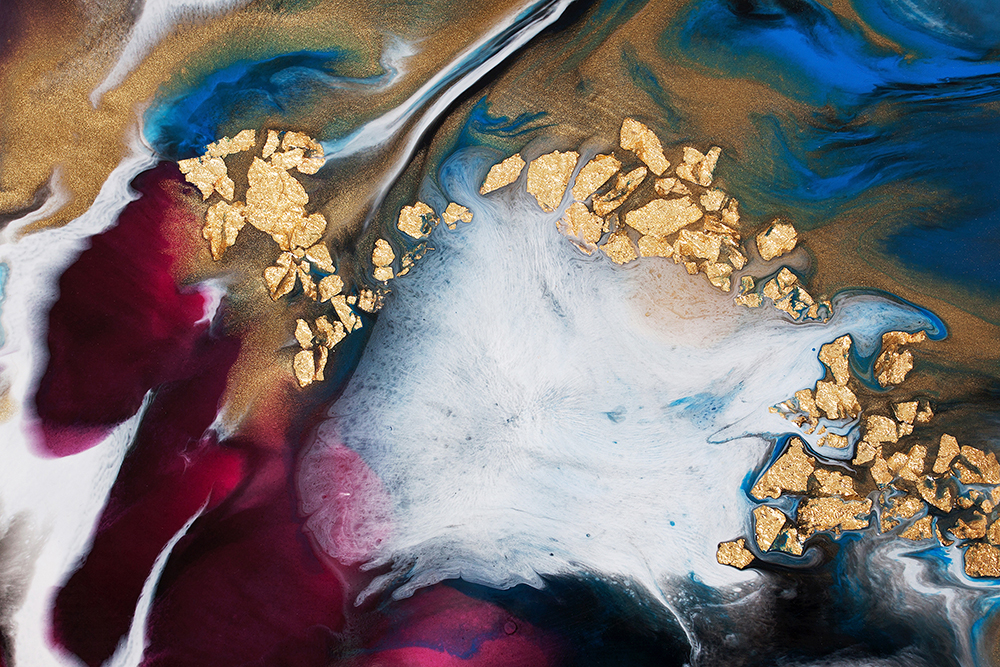
Ultimately the colours y'all apply will exist downwards to personal preference. If you're starting out try pouring with a few colours first. It tin can be tempting to throw in all your favourite paints, but the consequence may become as well busy and muddy. You can always add together more colour as yous keep. Glitter and metal paints are popular for pouring equally they add a bit of involvement to the painting.
Getting Started
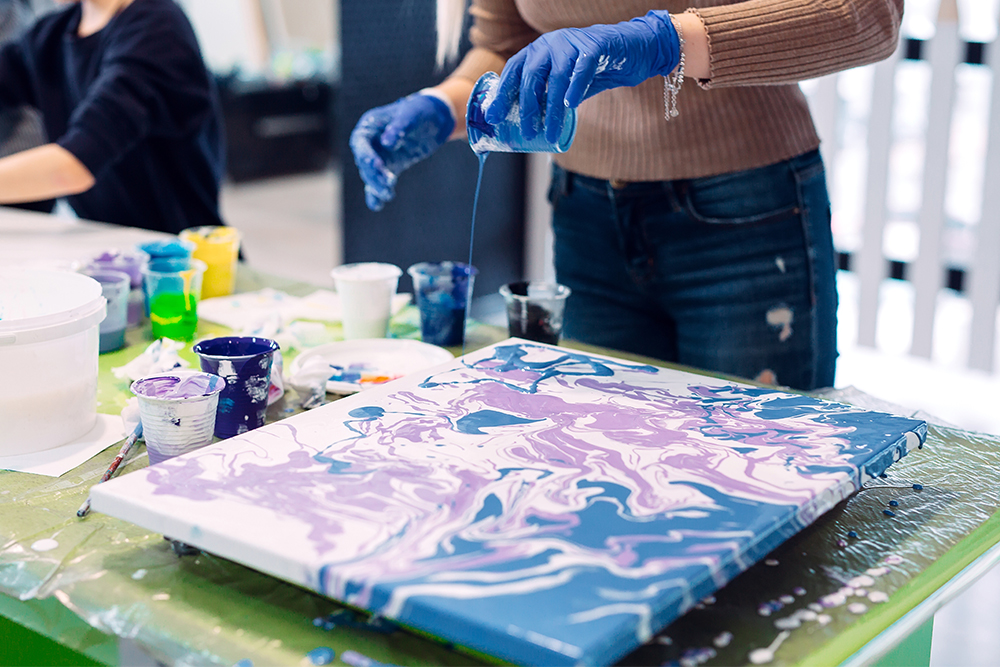
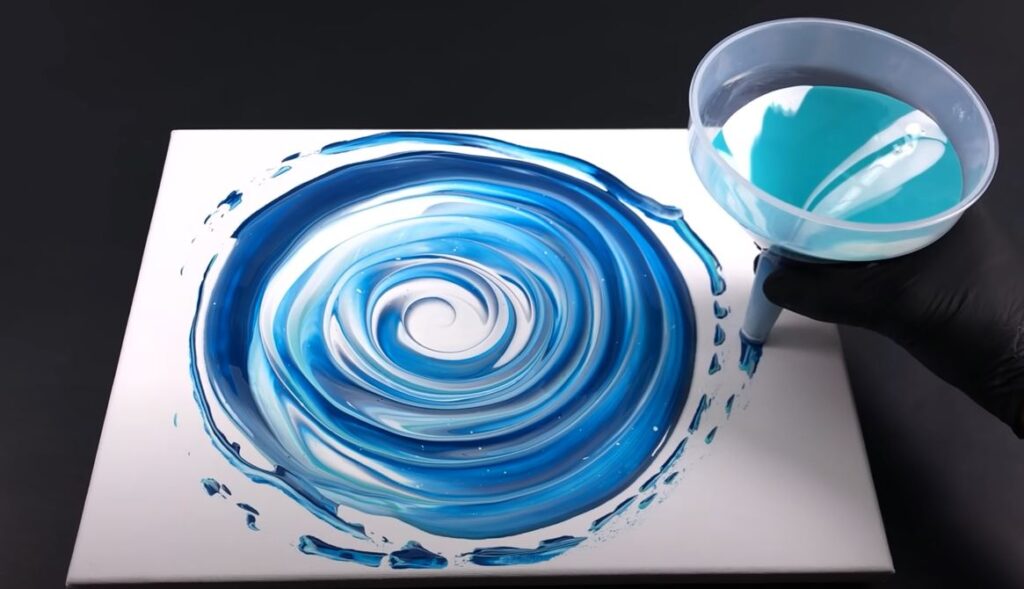
Once yous have your materials prepare, it'due south time to get down to the fun bit! Pouring the pigment onto the canvas. Pouring is an organic painting process that requires fiddling painting but creates dramatic artwork. There are a few different methods you can use to create your paintings.
Unproblematic Pouring Techniques
The list of pouring methods is endless! Artists are constantly experimenting and creating their ain unique pouring methods. If you're merely starting out it is important to go to grips with some basic techniques first. The two most simple techniques are the traditional pour and the dirty pour.
The Traditional Pour
The traditional pour is the simplest technique for any aspiring creative person to practice. All it requires is a few unproblematic steps.
- First mix each colour with pouring medium in a separate cup.
- Take each colour in plow and gently pour it onto your sail or lath. This technique allows for more control over where your color goes.
- Yous can drop $.25 of color here and there where you remember the composition requires it.
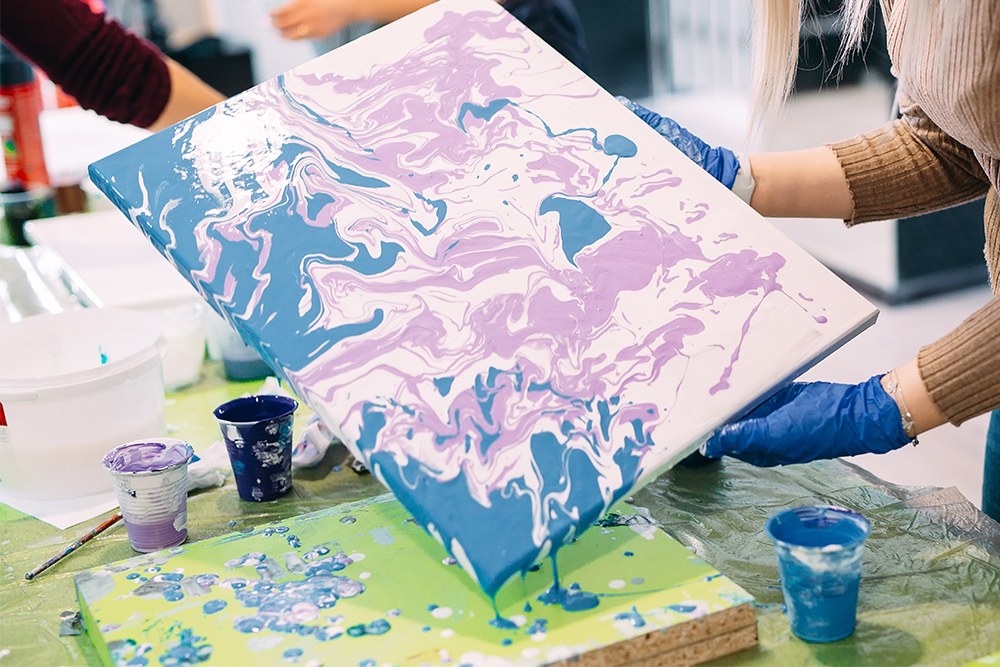
- Once your paint has been applied y'all tin pick up the sheet and gently tilt information technology to encourage the paint to class interesting patterns and puddles. Allowing the pigment to run downward the sides volition give your composition a finished look.
This method focuses purely on manipulating the paint lone, without worrying well-nigh calculation additives or creating cells. In one case you take got the hang of this technique you lot'll exist more ready to tackle the muddy cascade!
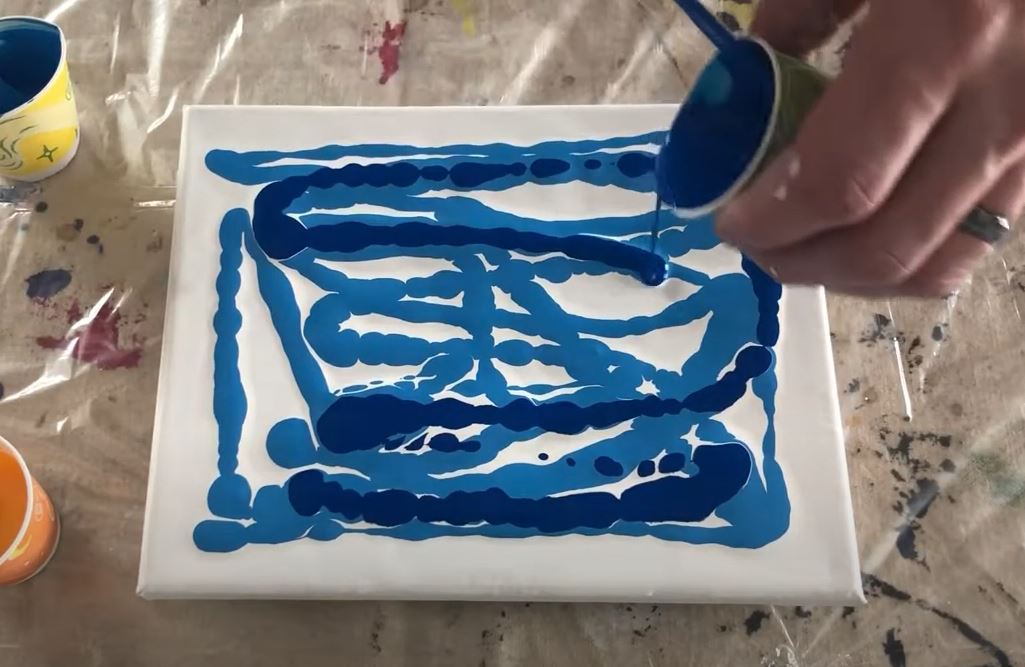
The Dingy Pour

Unlike the traditional pour, the Muddy Pour relies on all your colours being held in a single plastic cup.
- Every bit with the traditional cascade you will starting time need to mix your colours with pouring medium in individual cups.
- Next, take i make clean newspaper cup and gradually add colours into it in successive layers. The fashion you pour your paints into the cup volition determine how they appear when you lot pour them onto your sail. Try pouring colours down the inner side of the cup or straight into the centre to run across how the positioning affects your pours. The speed at which color is added will too modify the fashion information technology pours. If you add colour speedily it will force it to the bottom of the cup. If you lot add color slowly information technology will sit at the peak of the cup. Utilise different speeds and positioning to create unlike types of pours.
- Gently pour the colours from the loving cup directly onto your canvas. This can be washed in any sort of pattern you wish – just make certain the sail is pretty evenly covered.
- One time all the colour has been added you tin can pick up the canvas and carefully tilt it. Tilting encourages the paint to make full every spot, and can be used to create interesting patterns.
Once you lot've mastered these techniques you'll be able to motion onto more advanced methods. At that place are so many dissimilar ways to pour paint. Cheque out our postal service ix Basic and Avant-garde Acrylic Pouring Techniques to Endeavour Today to discover new ways to develop your pour painting artistry! All are as fun and can have incredible results.
Using Additives
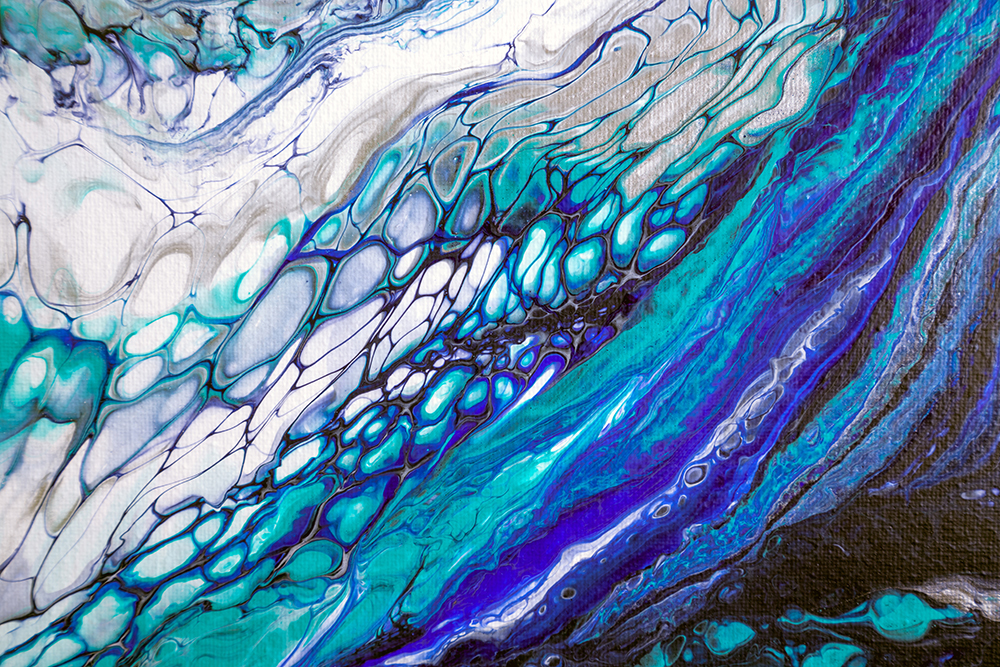
Some artists like to employ silicone as an additional ingredient in their poured paintings. Using silicone tin promote the creation of 'cells'. Cells are small aerosol of colour that rising above the residuum of your paint and sit on the surface. They give your paintings a more than defined marbled advent. This 'cell' structure works on the premise that oil and water do non mix. The added silicone oil acts equally a resist which prevents each of your colours from mixing with one another. By and large a drib or so is added to each colour/medium mix before it is poured onto the canvas. Similar kinds of effects tin can exist achieved with isopropyl booze or booze ink mediums.
As a beginner y'all may wish to experiment with these additives, just be aware that silicone oils available at hardware stores can be toxic and do not have the same archival qualities as professional artists products. Using additives like silicone also adds some other layer of unpredictability to your painting procedure. For some techniques it may cause your painting to crack or dry incorrectly as it leaves a greasy residue. Information technology is all-time to experiment offset and proceed with caution!
Some artists use the paint density of each colour to create cells without the utilise of additives. Lower density pigments will rise to the surface of your pour, whereas heavier pigments volition sink to the bottom. This density information tin can exist hard to come by. Currently Gold are the only manufacturer that publish the pigment density of their artists' colours online.
Drying Time
Once your pour painting is completed information technology is important to exit information technology to dry for at least 24 hours. If your paint movie is particularly thick you may even need to await as long as 72 hours. In this time your pour volition move and shift – your painting may look considerably unlike from when y'all left information technology! Because of this it is important to leave your work completely undisturbed. Whatsoever bumps or movement tin can crusade your carefully crafted patterns to move or fifty-fifty run off the canvass. Ultimately, pouring is an organic and spontaneous painting process – yous can do your best to control the results you create, but be prepared for differences between the moisture and dry painting.
Embrace Your Painting
You should also make sure that your painting is covered while information technology is drying. If your art is small enough you lot may be able to embrace information technology with a box. Only make sure it is free of grit before you use it! If you are working on a larger calibration you lot can use plastic sheeting to create a tent over your piece of work. In fact some manufacturers – like Gilded – encourage this method equally information technology protects your painting from any potentially dissentious air flows and raises the humidity slightly to reduce the stress on the paint film.
Keep your Workspace Level
Level drying is the key to the success of pour painting. Uneven paint film caused by an irregular work surface can cause weakness in your paint film. If you discover that your paint is pooling in item areas you can bolster your canvas supports with wedges of folded carte du jour or paper. Just make sure your painting is stable!
If you are doing multiple pours on a single canvas brand sure you allow sufficient drying time before completing each successive layer. If the first layers are not fully dry before a new fluid layer it applied it tin can cause cracking and crazing on the surface of your work.
Factors that can influence your Acrylic Pour Paintings
The beauty of pour painting is its unpredictability. So many factors can touch on how your cascade paintings appear. Information technology can exist hard to replicate the aforementioned pattern twice! This can exist frustrating if you're a beginner. Bear in listen the following points and it should assistance you lot get more consequent results.
- If you lot are starting out with an unprimed, absorptive surface be sure to seal it start. Some surfaces may require multiple coats.
- The quality of paint yous utilize, the thickness of application, the use of additives, the consistency of your pour and whether or not proper pouring medium has been used will all affect how your paintings appear.
- Endeavor not to try pour painting in extreme temperatures or humidity. Both these factors affect drying times. Standard room temperature should be fine.
- Be certain to go on your workspace costless from contaminants similar dust and oil. If your sail or panels come into contact with them the quality of your paintings may be affected.
- Try to go along your paintings away from forced air – whether that exist air ducts, fans, hair driers etc. They tin cause uneven drying which will encourage tears and cracks in the paint film.
- Make sure your workspace is level. Non only will this arrive easier to pour, information technology besides results in less product waste running from your sheet.
Helpful Tips
Minimising Bubbles in your pours
If you lot notice bubbles appearing in your poured artwork in that location are a couple of techniques you tin can utilize to reduce them. If there are only a few y'all should be able to pop them with a toothpick or pin. A fine mist of isopropyl alcohol can also pause the surface tension of the meridian paint layer causing the bubbles to popular. Some artists also use heat guns or small blow torches (like the type you would employ in a kitchen) to get rid of bubbles. This method tin can generate new cells in your painting just besides risks patchy and uneven drying. The expanse that has been torched tin can dry out at a much quicker charge per unit, which will cause it to move and crack equally the rest of your painting dries.
Ultimately, the all-time way to avoid bubbles is to ready your pouring mixes correctly. Endeavor and mix your paints with minimum agitation and go out them to stand to gratis the bubbling. The conception of Pouring medium also expels bubbles readily. So using this instead of PVA will minimise the chances of bubbles appearing.
Minimising Waste
Try and select a cup that will accommodate the amount of paint yous plan to utilise. If you apply too big a cup then your colours will have more than space to mix and become dirty. Using an appropriately sized cup also minimises the amount of waste generated – you should just take every bit much paint as you lot plan to use! Most importantly never go rid of excess paint down your household drains! If there is excess paint in your cups allow information technology to dry out then dispose of it accordingly. We have some more data on disposing of your waste material water and pigment solids in an environmentally witting manner in our A Beginners' Guide to Painting with Acrylics: Tips to Get Started web log post!
Finally, remember that the real magic happens when you accept finished working on it. Sometimes it's important to step back from your work. Come dorsum to information technology in an hour or so to see how the paints take moved to create an organic design.
Another useful thing to know is that you should tilt your sheet until the pigment runs off the side to get the all-time issue. This is why it is of import to prepare your surface to protect it from the acrylics.
When it is completely dry, you might like to varnish your work of art to preserve the shine of the paints.
More Acrylic Pouring Resources
If you want to expand your pour painting skills so why non take at look at our 9 Bones and Advanced Acrylic Pouring Techniques to Endeavor Today blog mail service! You can build on the skills developed here and try out new and exciting ways to pigment. We as well stock Acrylic Pigment Pouring with Tanja Jung. This great volume covers all aspects of pour painting and is dandy for beginners and enthusiasts akin. Information technology includes 16 projects that will introduce you to some exciting techniques.
Ultimately, with Acrylic Pouring, experimentation is all part of the process. Once you've developed the basic skills you'll be able to try all kinds of methods. Endeavour painting moisture-in-wet, apply brushes and knives (or even a fork) to create pointed patterns. Endeavor flipping your canvas vertical and dripping paint from the top to the bottom. Dissimilar viscosities volition drip at different rates. You can fifty-fifty endeavour pouring onto a glass or plastic surface to create poured acrylic sheets! These sheets can so be cut and applies to mixed media work with acrylic mediums.

Source: https://www.artsupplies.co.uk/blog/the-beginners-guide-to-acrylic-pouring/
Posted by: leeotherid.blogspot.com
0 Response to "How To Make Large Cells In A Pour Painting"
Post a Comment