

How To Sand A Painted Dresser
Learn how to paint any dresser with my tried-and-true method for painting furniture with a beautiful paint finish that will stand the exam of time.
I've been looking for a piece of furniture for a blank wall in our family room for several months. We used to accept our kids' DIY play kitchen there just I'd moved it to my boys' bedroom, leaving a big open up infinite. I stalked Facebook market and Craigslist for several weeks before realizing I already had a slice of furniture stashed away in the basement that just might work.

Obviously this dresser is meant to exist bedroom article of furniture; just when I moved it into identify, it was a perfect fit for this space. My favorite matter almost long, depression dressers like this is how well they can work in almost any room as a buffet, a console table, or only extra storage.
This particular dresser was covered in scratches, scuffs, and water rings, only I love the elementary, classic lines.
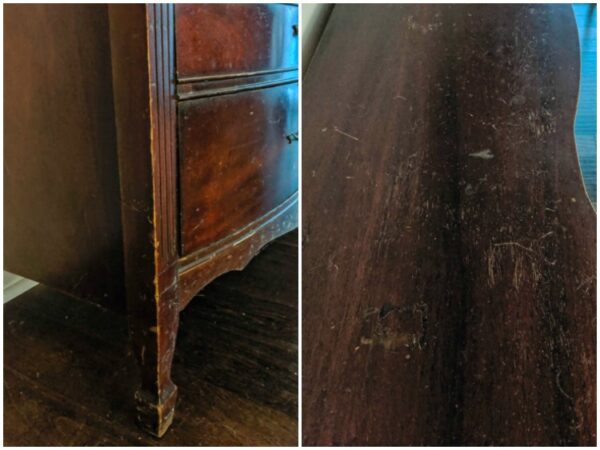
I knew it could exist a cute piece again with a simple paint job.
I'm sharing the steps I used to turn this dresser dorsum into a dazzler with a unproblematic paint job. This same exact method volition work on any type of dresser.
Afterwards painting many different types of furniture and making many mistakes, I have figured out a simple process for ensuring I become a perfect paint finish every fourth dimension. This method works for whatsoever blazon of wood, any blazon of furniture, and even any type of pigment.
And virtually chiefly, it gives a paint finish that will last – fifty-fifty in a business firm with 3 little boys! Because in that location is nothing worse than spending hours painting a slice of article of furniture simply to have it chipped and scratched within weeks.
Also, after several months on hiatus, my fellow Article of furniture Flippers are dorsum in action sharing their own latest furniture DIYs. Yous can detect them all at the lesser of this post.
This post contains chapter links which means if you brand a purchase later on clicking a link I will earn a pocket-sized commission only information technology won't cost you a penny more. Click here to encounter my full disclosure policy.
Materials for painting a dresser
Cleaner – I used Krud Kutter PrePaint Cleaner
Rag or paper towels
Painter's tape (if needed)
Wood filler
220 dust sandpaper
Primer – I love Zinsser Oil-based Primer
Paintbrushes – (it is easiest if you have 2-three unlike paintbrushes, one each for the primer, paint, and sealer)
Foam roller and paint tray
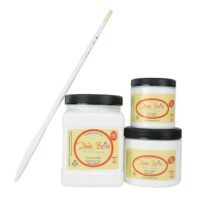
Paint – I used the Dixie Belle paint colors French Linen and Cotton fiber. Whatsoever furniture paint will work including chalk paint and latex paint.
Sealer – I used General Finishes High Operation Peak Coat in Satin
Blue sponge for applying sealer (optional)
How to pigment a dresser
Preparing the dresser
The nigh important part of any furniture painting project is the prep.
Start past removing the hardware and setting it aside. There may be some hardware that isn't removable – keyholes, decorating pieces, or stubborn drawer pulls. You tin carefully cover any hardware that tin can't exist removed with painter'southward tape.
Give your dresser a really good cleaning. As tempting as it may be, don't skip this stride. Any dust, grease, or residue on your dresser volition prevent the paint from adhering.
I like to use Krud Kutter PrePaint Cleaner for cleaning. It's quick, thorough, and doesn't have to be rinsed off. I've also used a elementary mixture of water and dawn dish lather in the past and that also works well.
Once everything is cleaned, exercise a quick assessment of your dresser. Are there cleaved parts that need to exist repaired? Peeling veneer that needs to be removed? If so, make whatsoever necessary repairs.
This is a practiced time to decide what type of hardware you want to use on your dresser in one case it is painted. You don't have to cull the verbal hardware notwithstanding, but y'all need to know if y'all will be able to reuse the holes from the original hardware.
If yous will non be reusing the old holes, fill them with wood filler. At the same time, you tin can also fill any deep scratches and dents with wood filler.
I chose to reuse the hardware for my dresser so I didn't need to fill the holes. There were, even so, circular scratches around each of my drawer pulls, likely from hardware that was used at some point in the past, that needed to exist filled.

Once the forest filler has fully dried, sand it smooth with 220 grit sandpaper. At the same time, you tin can sand any rough spots.
You may need to do a second round of forest filler to get a completely shine surface. So utilize a clean rag to wipe away the dust from sanding.

I definitely should accept used a dropcloth for this role!
Priming the Dresser
Once your dresser is prepped for paint, the next footstep is primer.
But expect, why are we using primer? Yous don't need to utilise primer when yous utilise chalk paint!
Well, that is truthful – sort of. Yous do not demand primer to make chalk pigment stick to your furniture. However, primer besides does another of import job when painting furniture: it helps seal in the woods tannins that love to ruin a beautiful paint task.
Have yous ever painted a slice of furniture a beautiful, vivid white but to accept it start yellowing? The bulk of the time, this is caused past wood tannins. Even if the yellowing doesn't testify up until the very last glaze of paint, it's however likely caused by woods tannins.
To prevent this, y'all need to seal in the wood tannins before you kickoff painting. A h2o-based primer will not work for this. There are a couple of products that do work, just past far my favorite is a proficient oil-based primer.
I use Zinsser Cover Stain oil-based primer all the time and it has never failed me. And yes, you tin use any paint over an oil-based primer including latex pigment or chalk pigment.
(Have more primer questions? Primer can be confusing merely it is and so important for a nifty paint cease, so I wrote a guide answering all of the mutual primer questions.)

I notice it easiest to remove the drawers before priming and painting.
Use a paintbrush to employ primer to detailed areas and hard-to-reach places and and then use a small foam roller to use primer to all of the big, flat surfaces. You lot tin use a paintbrush for the whole thing if yous adopt, but using a roller saves a lot of time and often gives a smoother cease.

Don't exist alarmed if the primer coat looks really splotchy and bad – that'south totally normal. Once you add paint, it volition starting time to wait much better.
Since we are using an oil-based primer, you lot will demand to clean your paintbrush using mineral spirits. You cannot clean oil-based products with water. If you become some on your skin, I have found that baby oil or an oil-based facial cleaner work well to help wash them off.
Painting the dresser
Finally it is time for the paint! As I mentioned before, you can really use any type of paint using this method. Plain latex paint will piece of work just fine, as will chalk paints and other specialty article of furniture paints. (If you lot desire a bit more guidance on which paint to use, I have a whole post nearly the best paints for piece of furniture.)
For this dresser I used Dixie Belle chalk paint. I've used many brands of chalk paint, merely this was my first time using Dixie Belle and I really liked information technology. It went on smoothly and covered well.
I had a really hard fourth dimension choosing a color for my dresser. I knew I wanted to use a light, bright color since it would be in a room that doesn't go a lot of natural light. Simply I didn't want to paint it white since it would exist confronting a big white wall. I ended up making a custom colour by mixing the Dixie Belle colors French Linen and Cotton. Information technology'south a putty/greige color and is a slap-up low-cal, neutral color that still stands out against all the white.

You lot can use your paint the same style you did the primer. Use a paintbrush for edges and small details and a foam roller to paint the large, flat surfaces. You will probably need two coats of paint to get even coverage.
Sealing the dresser
Sealing your painted furniture is ane of the most important things you lot can practise to make sure your paint terminate lasts. (I learned this lesson the hard way!)
Furniture painted with latex paint and chalk paint always demand to be sealed. There are some other awesome furniture paints out there that claim they practice not have to be sealed. And they don't. Nonetheless, they will terminal much longer with a good sealer on pinnacle.
A good sealer or top coat volition protect your cute paint finish from scratches, chips, scuffs, and stains. Sealers too protect your paint finish from water and create a surface that is easy to clean.
My favorite sealer to utilize on painted furniture is Full general Finishes Loftier Performance Top Coat. It is like shooting fish in a barrel to apply, holds upwardly well, and works well over all types of paints and sealers. (Want to see more options? Check out my guide to the best and worst sealers for painted furniture.)
I typically apply my sealer using a expert, quality paintbrush. This fourth dimension I decided to endeavour something different.
I used the Dixie Belle blue sponge applicator and I'1000 a large fan. The sealer went on incredibly smoothly with absolutely no brush marks. I will definitely be using this again in the future. (I don't recommend a roller for applying sealers; they sometimes leave behind air bubbles and information technology is generally harder to get a smooth finish.)
Replacing the hardware
In one case the sealer is fully dry out, you can gently add your drawer pulls and other hardware. Yous can also remove the painter'southward tape from whatever hardware that couldn't exist removed. Exist very conscientious removing the painter's tape because information technology is easy to accidentally pull off some of the paint equally well. If yous have a stubborn piece of tape that seems sealed in identify, advisedly use a razor blade or other sharp surface to cut around the edge where the painter'south tape meets the painted surface earlier removing the tape.
For my own dresser makeover, I chose to reuse the hardware it came with. I kind of liked the simple shape and of course, not needing to buy new hardware was a money-saver.
I did give them a chip of an update though. I dry-brushed the hardware with DecoArt Metallics champagne gold paint. This is ane of my favorite gold paints considering it is very subtle and not too flippant.

To utilize the paint, I dipped a clean rag lightly into the paint then wiped off whatever excess before lightly dabbing it onto the hardware. The original blackness still shows through merely I call up the touch of gold gives just the right corporeality of smoothen and style.

 Be extra gentle with your dresser for the first several weeks after yous finish painting it. It typically takes paint 21-30 days to fully cure or harden. During those first few weeks, it is especially easy to accidentally scratch the paint finish, even afterwards using a practiced sealer.
Painted Dresser Reveal
And here's how my sweet little dresser looks now:


I admittedly love how this painted dresser turned out. The simple, fresh paint really accentuates the classic lines and shape. And the color is the perfect not-white neutral.

At beginning I was planning to hang a mirror over the dresser, but when I tried information technology, the dresser/mirror combination was giving off really strong sleeping room vibes. Not what I was going for.
Instead I hung this pretty painting I constitute at a yard sale and a brass moving picture low-cal over it. I dear this combo and I think it definitely helps the dresser look right at home in our family unit room.

More Furniture DIYs
Set to see what my boyfriend Furniture Flippers are up to this calendar month? Just click the links below to visit each furniture DIY.
Chalk Pigment Furniture Before and Afterwards past Thirty Eighth Street
How to Make a Headboard with Caning past Refresh Living
How to Whitewash Wood by Repurpose and Upcycle
How to Pigment a Dresser by Lovely, Etc. (you are here)

I'd honey for y'all to pin this post on Pinterest!

Materials
- Cleaner
- Rag or newspaper towels
- Painter's tape
- Woods filler
- 220 dust sandpaper
- Oi- based primer
- Paint
- Sealer
- Bluish sponge for applying sealer
Tools
- Paintbrushes
- Foam roller and paint tray
Instructions
- Remove the hardware and set information technology aside.
- Give your dresser a skilful cleaning with Krud Kutter PrePaint Cleaner.
- Make whatever necessary repairs to the dresser.
- Use wood filler to fill in any holes. Polish with sandpaper.
- Prime the dresser with Zinsser Cover Stain oil-based primer using a paintbrush for pocket-size areas and a foam roller for large areas.
- Begin painting by using a pigment brush for edges and small details, and a foam roller for large, flat surfaces.
- Allow paint to dry and add a second coat.
- Use a sealer using a good, quality paintbrush, or with a sponge applicator.
- Once sealer is dry, add the drawer pulls and hardware.
Recommended Products
As an Amazon Acquaintance and member of other affiliate programs, I earn from qualifying purchases.
-
Cotton fiber Paint
-

French Linen
-

Full general Finishes High Operation H2o Based Topcoat, 1 Quart, Satin
-

Scotch Painter's Tape 2093EL-24E ScotchBlue TRIM + BASEBOARDS Painter's Record, 0.94-Inch ten lx-Yard, 1 Roll, Width, Blue
-

DecoArt Ameri Deco MTLC Cham Americana Decor Metallics 8oz ChampagnGld, i, Champagne Gold
-

Dixie Belle Paint Company Blue Sponge Applicator
-
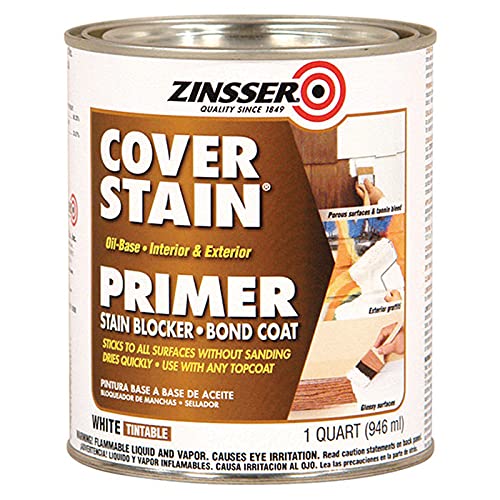
Zinsser 03504 Cover Stain Interior/Outside Oil Primer Sealer, 1-Quart, White
-

24PCS Sand Paper Multifariousness Pack Sandpaper 12 Grits Assorted for Wood Metal Sanding, Wet Dry out Sandpaper 120/150/180/240/320/400/600/800/thou/1500/2500/3000 Dust
-

Elmer's Products, Inc E848D12 Carpenter'due south Wood Filler, 1/2 Pint
-

KRUD KUTTER PC326 PC32 Prepaint Cleaner/TSP Substitute, 32-Ounce, Original Version
Happy painting!


Source: https://www.lovelyetc.com/how-to-paint-dresser/
Posted by: leeotherid.blogspot.com
0 Response to "How To Sand A Painted Dresser"
Post a Comment